So, if you’ve read my earlier posts, you’ll know I’ve been working on a more musically flexible framed laser harp, mainly achieved by adding functionality not usually present in these devices. At this point, I simply wanted to improve the look and performance of what I had already made.
I decided to invest in some more standard and stable laser diodes, that I purchased from a wholesaler in China. These took more than a little while to be delivered (close to 6 weeks), but when they arrived, I was pleased to find they exactly suited the project. They were generally more consistent with regards to brightness and collimation than the lasers I’d been taking from cheap laser pointers.
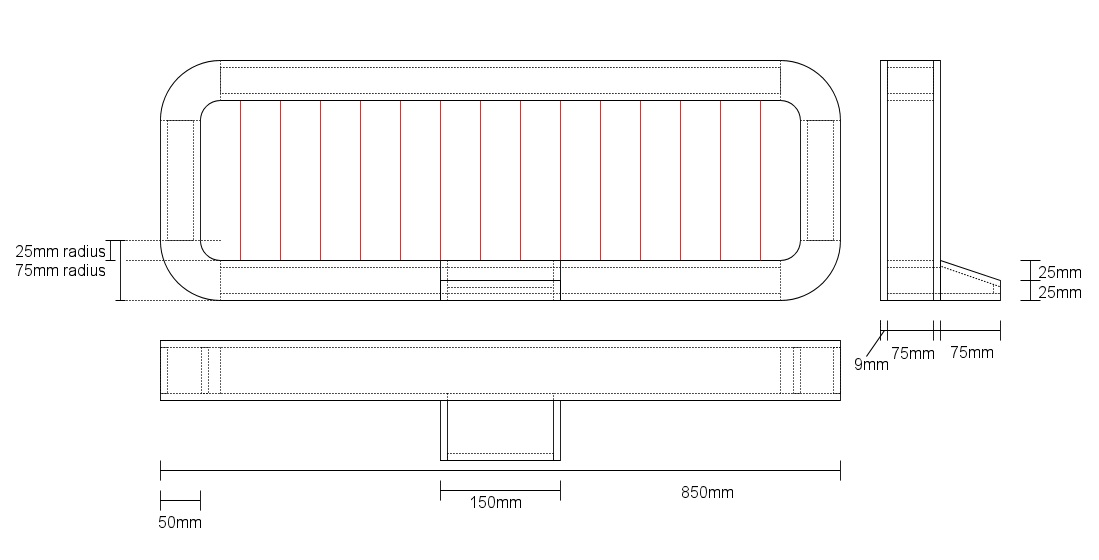
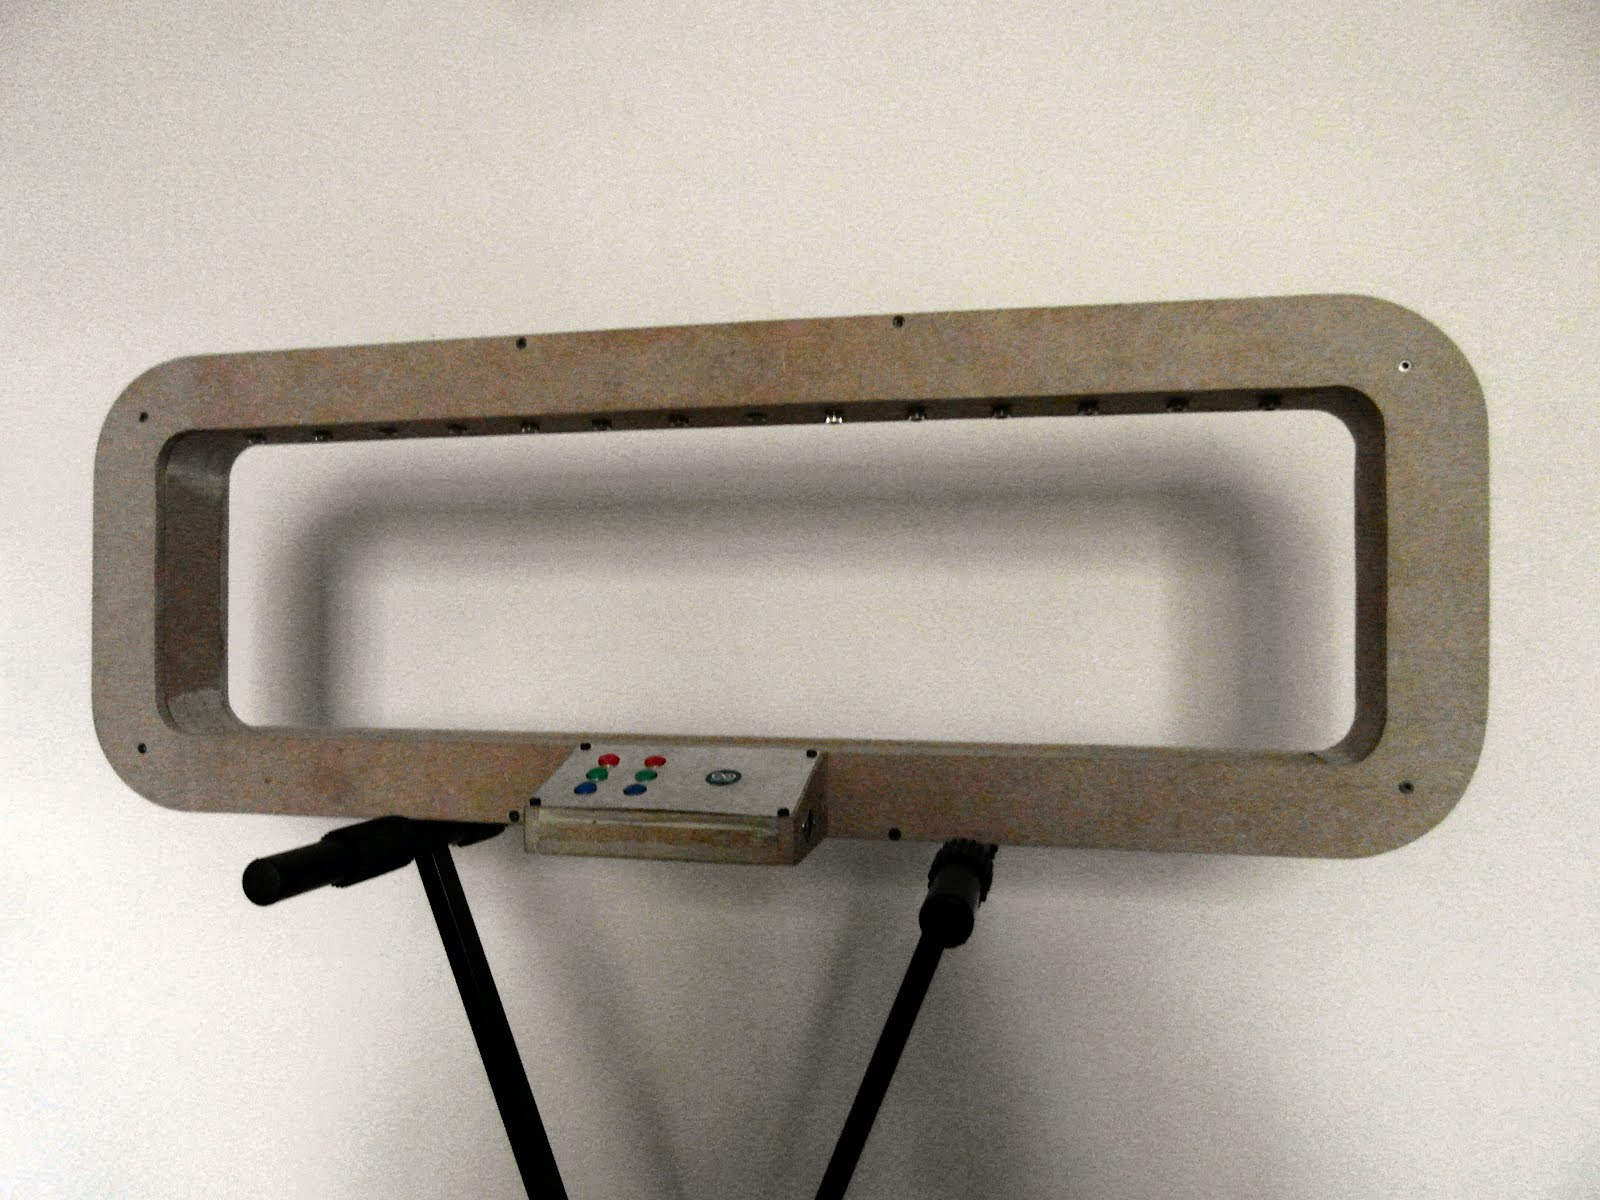
Working from the plans above, I built another (MDF) frame to house everything. This took a lot longer than the previous model, as the frame was glued, rather than screwed, and working out a simple, easily repeatable way to create the curves at the corner (with limited tools) was surprisingly the largest challenge I’d encountered so far.
Other than being a little neater (lots more sanding), and including an extra set of buttons to control octave shifts, this version of the harp is essentially the same as the first. The improved quality of the lasers had the bonus of making the velocity sensitivity of each note a little more effective.
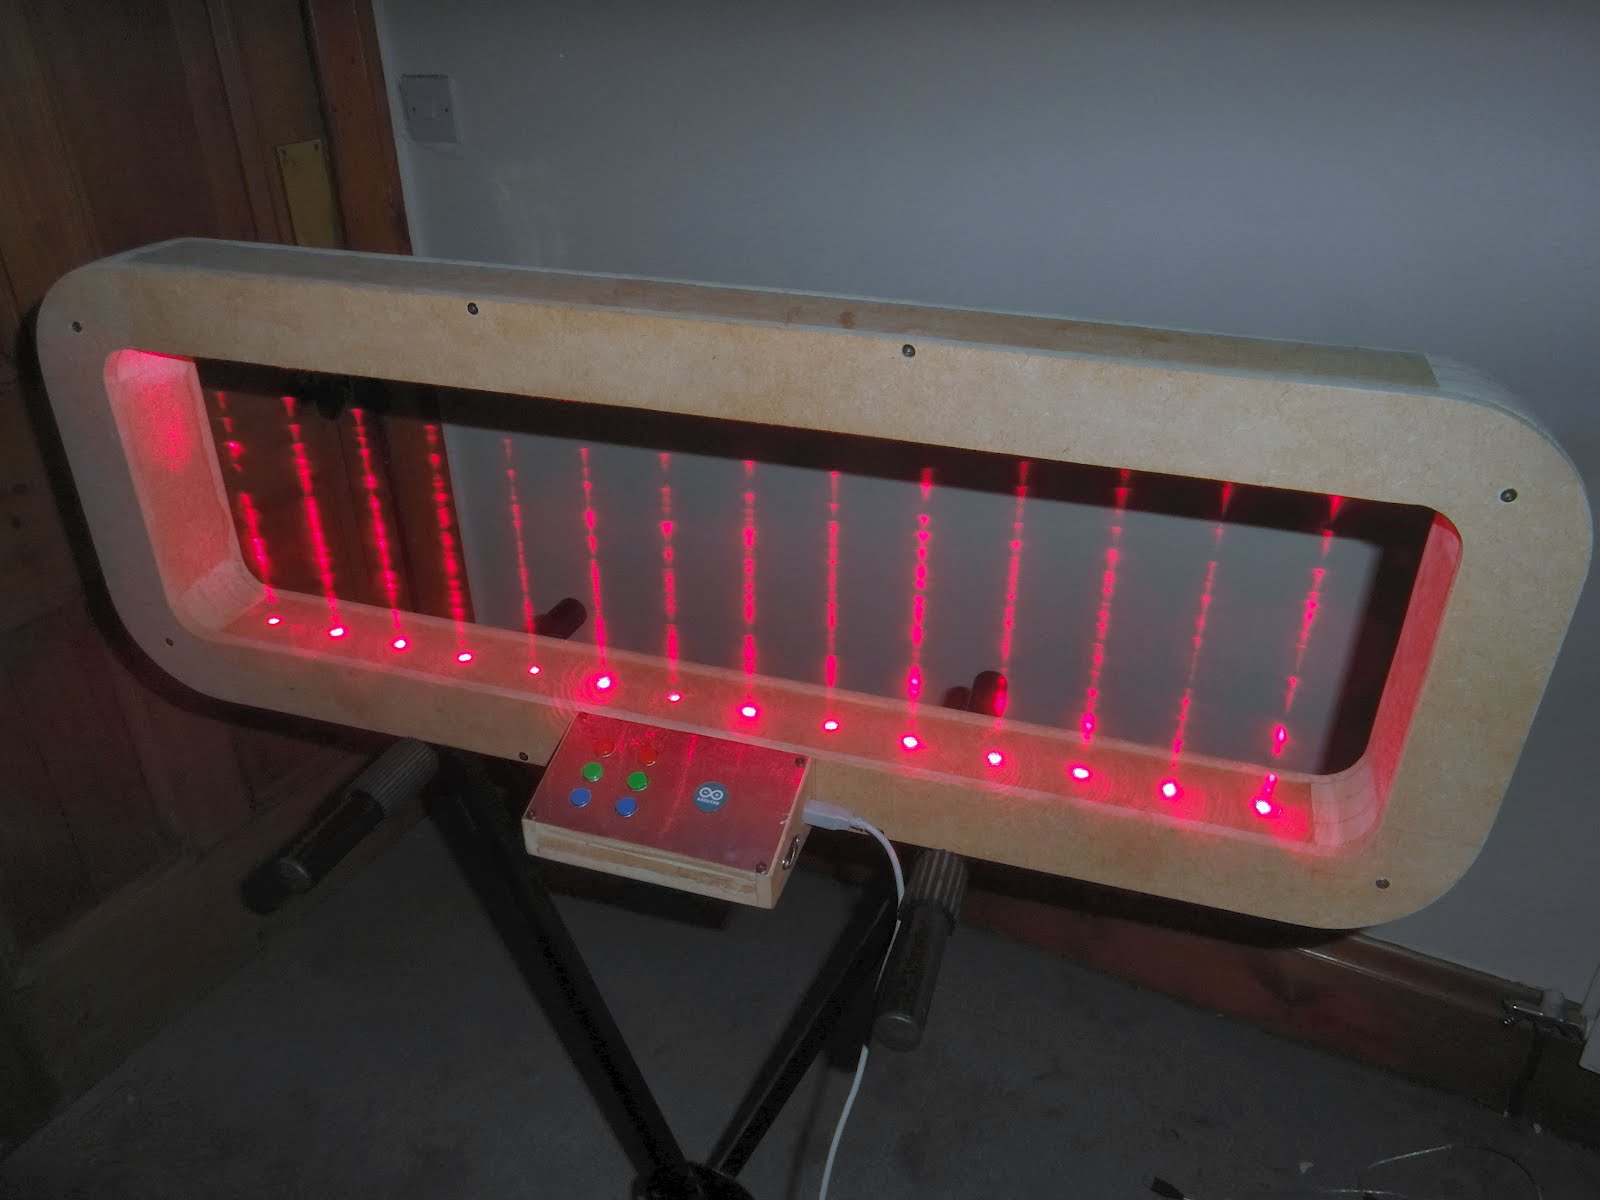
So here it is! The only thing left to do is paint for a final finish, and I might even leave that for the next model, as I’m kind of fond of the way this particular model is looking. You’ll notice the above image is a long exposure: I wanted to show a little more clearly where the beams are – they’re not really that visible in a well lit room. I chose to use low power beams as the lasers used in large stage laser harps are fairly dangerous – looking directly into the beams can burn your retinas instantly, or burn your skin if you choose not to wear gloves while using it.
Using lasers with an output <5mw (as I do) are bright enough to give the impression of interacting with light, while being low powered enough that you’d have to stare directly into the beam for several minutes before anything bad happened. This means I (and anyone else) can use it without specialised eye & skin protection.
I will (hopefully) be presenting this version at the MOSI mini maker faire in Manchester in July, so if you live nearby you can see and use it for yourself. Feel free to come along and try it out! I’ll be bringing along a couple of other gizmos I’ve created, of which I’ll write about another time.
P.S. I’m intending to put up a couple of videos of this thing in action, but in reality, an instrument with no haptic feedback whatsoever is a little difficult to play – it might be a while until I get a demonstration I’m happy with!


Andrew Suekert 9th December 2012
Chris,
My name is Andrew. I am currently a Junior in High School, and I am in Physics this year. This semester for our exam, we’re doing a project involving electricity and electronic devices. My partner and I chose to make a laser harp for ours, after finding Stephen Hobley’s laser harp. The only thing is, he used IR range sensors, and we, being students, cannot afford the range sensors…So! I just found your 14 note laser harp, and it’s exactly what we planned to do, except we’re only doing a 6 note harp! We have an arduino uno, yet…this being our first arduino project, we don’t know the whole coding process…at all… Would it be possible for you to share your wiring schematics, and also the code? If not, I understand, but PLEASE!!! if it is possible for you to e-mail me this stuff, or just talk me through it… I really, really want this project to work, and we can’t find anything else after weeks of searching… Please consider this, and I thank you for your time. Have a great weekend, and I look forward to hearing back from you!
-Andrew S.
chrisballprojects 9th December 2012
Hi Andrew!
I’ve been meaning to put together some schematics in fritzing (http://fritzing.org) for a while now, as well as adding proper comments to my code. When I’ve got those together, I’ll be happy to email them over. As you’re only doing a six note harp, you should be able to put the circuit together without a multiplexer, which should make it a lot simpler.
In the meantime (if you haven’t already) I recommend you find your lasers, as they can be hard to source cheaply. I’ve only worked with low power lasers (<5mw) for my projects, so it's probably best they're in this range. You could also make a start on the frame that will house everything.
Let me know your deadline at chrisballprojects@nullgmail.com – I'll try and send something over in the next few days!
-Chris
Julia Rainer 21st September 2015
Hello!
I now have been looking at loads of different tutorials on how to build framed laser harps and your model is one using more than the standard 6 Arduino analog I/Os.
I have seen you mentioned multiplexing and I have a few small questions about how this affects your instrument.
I want to build a laser harp, but with approx. 36 lasers ideally. This means I’m either using several arduinos or/and multiplexing>>>
So my questions revolve around how your code and schematics look like if you could give me any tips about this?? and, very important for my project: can you play multiple notes at the same time when using the multiplexer? Is your harp connected to software or a synthesizer and how does the software react to the harp?
Do you use the digital I/Os instead of the analogue ones like most other tutorials show? As I have no idea how to use the digital I/Os to make a laser harp, I would be very grateful for any information you could provide me with!!!
If I sounds like I repeated myself its because my mind is blown because I try to understand everything at the same time!!!
I would really love if you could send me any details about this to my email or if you even know any links that could help me (some obscure links which my browser doesn’t seem to find…)
I’m really looking forward to get a message back from you because I don’t think my engineering skills are any good with programming and code!!!!
Julia
Chris 23rd September 2015 — Post author
Hi Julia,
I’ll start by answering your questions in order, and then give some general advice for your project.
-if you want to see code and/or schematics, email me. you can find my email on the contacts page – I’ll send something through.
-You can play multiple notes at the same time – my laser harp is a MIDI device, which means it only sends messages to a synthesiser to tell it which note to turn on/off, so the number of notes you can play simultaneously is only limited by the power of your computer/synthesiser. The maximum number of notes that can be played simultaneously is usually referred to as ‘max polyphony’. To get the best performance, I’d suggest using a very simple software synthesiser on a reasonably powerful computer.
-I use one analog input for all 14 light detectors. I only need to use one as I’m using a 16-way multiplexer (see below). I’m only using analog as I wanted to get an idea of the speed/velocity of the note being played. It’s possible to use digital IOs only if you want to avoid multiplexing – email me for advice on this.
Building a 36 note laser harp is perfectly possible with one arduino and some extra components, but you will need to understand multiplexing first. There is a good tutorial here: http://playground.arduino.cc/Learning/4051.
I’d describe it this way – your TV has multiple inputs: composite, DVI, HDMI, SCART etc, but only one can be viewed at a time on the screen (the output). If you wanted to know what was going on on all of your TV’s inputs, you’d have no choice except to flick through them all in succession. We do this when we multiplex with an Arduino. We need more inputs, but really we only compromise by flicking through a bunch of inputs to see what’s happening on each of them.
For your project, I’d suggest you use three of these multiplexer chips on three analog ports:
http://www.ti.com/lit/ds/symlink/cd74hc4067.pdf
You’d wire up 12 light detectors on each, to be paired with 12 lasers. You can set the address for all three multiplexers from the same four digital pins.
I hope this isn’t too much information!
Best wishes,
Chris